Monday, March 5, 2018

week#5: PPT#3 continued
Monday 3/5/18
Slide#4 - Hard light - list the characteristics associated with this type of light and then look for 3 flickr photos that shows it. please add a caption under it, cite the link.
repeat for the other 3 types of lights.
slide # 5 = Soft light
slide # 6 = Transmitted light
slide # 7 = reflected light
send a screen shot of the last slide you are working on 5 min before the end of the period for participation today.
*** when you google: type flickr first, then add the ___ light you are looking for... click on images you will find lots of pictures.
Bring SD card tomorrow we will be taking samples... if you borrowed a camera last Friday hold on to them til tomorrow.
Slide#4 - Hard light - list the characteristics associated with this type of light and then look for 3 flickr photos that shows it. please add a caption under it, cite the link.
repeat for the other 3 types of lights.
slide # 5 = Soft light
slide # 6 = Transmitted light
slide # 7 = reflected light
send a screen shot of the last slide you are working on 5 min before the end of the period for participation today.
*** when you google: type flickr first, then add the ___ light you are looking for... click on images you will find lots of pictures.
Bring SD card tomorrow we will be taking samples... if you borrowed a camera last Friday hold on to them til tomorrow.
Friday, March 2, 2018
PPT # 3: Photography Lighting due Wednesday March 7 2018
Friday:
slide 1: PPT# 3: Photography lighting controls Cover page
Slide 2: Video review
Intro Video review..https://www.youtube.com/watch?v=u9prcUCHlqM
Slide # 3:
Define the following.
1. Light
2. Medium
3. Aperture
4. Shutter Speed
5. Composition
6. Optics
**************************************************
Monday: 4 types of lighting and Flickr examples....
Find 3 examples for each types of Lighting (12 pictures in all)
*************************************************
Tues: Take a sample picture for each type and upload to FLickr... # 26,27,28,29
HW: Click on the orange links...
if you are still not sure about EXPOSURE Triangle watch these video on ISO control / Aperture control / Shutter speed - and learn to adjust them.
**************************************************************
Wednesday: How to adjust my DSLR ( read the manual) then Share and print (PPT # 3 due)
** Diagram on DSLR works https://goo.gl/images/xeiRNT
Intro Video review..https://www.youtube.com/watch?v=u9prcUCHlqM
 |
| more detailed click -->https://goo.gl/images/AqdB6v |
Define the following.
1. Light
2. Medium
3. Aperture
4. Shutter Speed
5. Composition
6. Optics
**************************************************
Monday: 4 types of lighting and Flickr examples....
Find 3 examples for each types of Lighting (12 pictures in all)
*************************************************
Tues: Take a sample picture for each type and upload to FLickr... # 26,27,28,29
HW: Click on the orange links...
if you are still not sure about EXPOSURE Triangle watch these video on ISO control / Aperture control / Shutter speed - and learn to adjust them.
**************************************************************
Wednesday: How to adjust my DSLR ( read the manual) then Share and print (PPT # 3 due)
** Diagram on DSLR works https://goo.gl/images/xeiRNT
Thursday, March 1, 2018
Mid term check list & PTC next week on 3/8 and 3/9
| 1st marking Period for ___________________________________ anything turned in after Friday 3-14-18 will not be counted AJS11-0___ | ||||||||||
| Classwork | (5%) | Due | Late? | E.C. | Due | Flick | Photo (s) | |||
| Flickr acct | 2-Feb | 3-Feb | selfie | __ /2 | ||||||
| QR code | 2-Feb | 7-Feb | Diagram | __ /1 | ||||||
| drawing | 7-Feb | 15-Feb | PPT #2 | __ /12 | ||||||
| press pass | Power Points (30%) | 26-Feb | City story | __ /10 | ||||||
| SD card (5%) | PPT #1: Camera | 12-Feb | 6-Mar | 4 lights | __ /4 | |||||
| PPT #2 Art &Present | 15-Feb | 9-Mar | Test | __ /2 | ||||||
| QUIZ (10%) | PPT #3:Lights | 7-Mar | 15-Mar | Total | ___ / 30% | |||||
| DSLR____ Test with write up (20%) | ||||||||||
please edit the label as follows....
Flickr check list:
#1: Selfie
What camera did you use to take it?
#2: Best Photo so far
what makes it a good photo?
#3: Diagram of the DSLR camera.
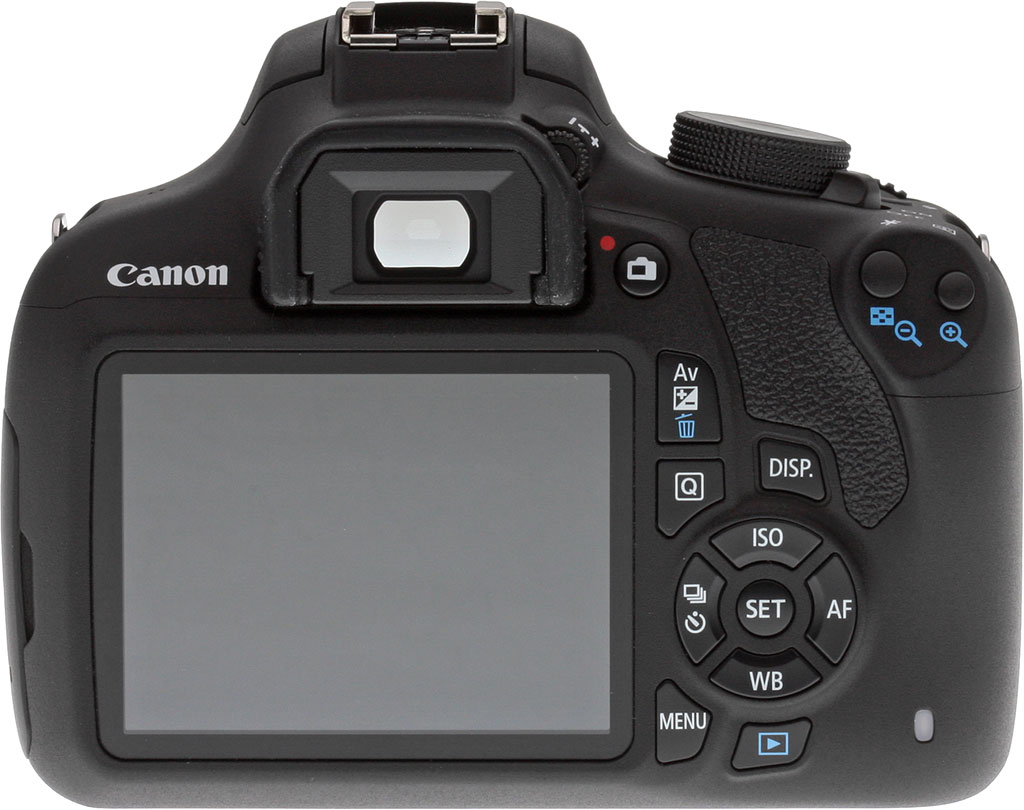
Canon Rebel T-5 or Nikon D3100 or D3200 ( which one did you draw?)
**************************************************************************************
Powerpoint # 2 (just copy and paste for the title)
**************************************************************************************
Powerpoint # 2 (just copy and paste for the title)
#4: Lines - Element of Art
#5: shapes / form - Element of Art
#6: space - Element of Art
#7: value - Element of Art
#8: Texture - Element of Art
#9: color - Element of Art
#10: Emphasis - Principles of Design
#11: Visual Balance - Principles of Design
#12: unity - Principles of Design
#13: contrast - Principles of Design
#14: Movement/Rhythm - Principles of Design
#15: Pattern/Repetition - Principles of Design
# 16 to # 25 City pictures taken with element of art and composition.
PPT # 3: Photography lighting
# 16 to # 25 City pictures taken with element of art and composition.
PPT # 3: Photography lighting
# 26 Hard light
# 27 Soft light
# 28 transmitted light
# 29 Reflected light
# 30 a, b test # 1
make an album for MP1 as well send link when complete to 30b.
make an album for MP1 as well send link when complete to 30b.
Monday, February 26, 2018
week#4: Presentation and PPT # 3
Welcome back from Winter break... pls send a screen shot of your updated Flickr to me.
Recap: We have done PPT # 1 & 2 so we are presenting them.
then we are going learn about Lighting in Photography with PPT # 3 (click for instruction)
keep practicing with the camera (in Manual mode) 1st marking period exam next week!
in preparation for the Test coming up...
let's learn how to set up the camera to take the picture in Manual Mode...
read up on the manual on how to adjust the camera setting in "Manual" M mode.
1st, 2nd, 3rd and 8th period - Canon Rebel T-6 manual


Recap: We have done PPT # 1 & 2 so we are presenting them.
then we are going learn about Lighting in Photography with PPT # 3 (click for instruction)
keep practicing with the camera (in Manual mode) 1st marking period exam next week!
in preparation for the Test coming up...
let's learn how to set up the camera to take the picture in Manual Mode...
read up on the manual on how to adjust the camera setting in "Manual" M mode.
1st, 2nd, 3rd and 8th period - Canon Rebel T-6 manual

take 1 set HIGH to Low ISO, 1 set with large vs. small aperture (AV) and 1 set of fast vs slowshutter speed (Tv)
Wednesday, February 14, 2018
Winter break assignments...
we will be presenting powerpoint # 1 and # 2 when we get back... so each table needs to select a power point consolidator... this will also be your table leader ( you get extra credit for your work)
Table 1 vs. table 2 for PPT # 1
Table 3 vs table 5 for PPT # 2 (part 1)
Table 4 vs table 6 for PPT # 2 (part 2)
before the end of the period make sure you have all the members powerpoint so you can combine them. so send your coverpage to me before the end of the period.
Everyone make sure you upload Flickr # 4 -15 with title and description over the winter break...
and also take 10 pictures of the City with your phone camera that incorporates the element and/ or principles of designs...
write your story with your 10 pictures in google doc or Publisher attach PDF and printout.
send PDF when you are Done. AJS11-0__ your name Photo story# 1: City-scape
Table 1 vs. table 2 for PPT # 1
Table 3 vs table 5 for PPT # 2 (part 1)
Table 4 vs table 6 for PPT # 2 (part 2)
before the end of the period make sure you have all the members powerpoint so you can combine them. so send your coverpage to me before the end of the period.
Everyone make sure you upload Flickr # 4 -15 with title and description over the winter break...
and also take 10 pictures of the City with your phone camera that incorporates the element and/ or principles of designs...
write your story with your 10 pictures in google doc or Publisher attach PDF and printout.
send PDF when you are Done. AJS11-0__ your name Photo story# 1: City-scape
Happy Valentines Day
https://www.diyphotography.net/diy_create_your_own_bokeh/
 Bokeh is an adaptation from a a Japanese word meaning blur. In photography this term is used to describe the quality of the areas in the picture which are not in focus.

DIY – CREATE YOUR OWN BOKEH
Bokeh is an adaptation from a a Japanese word meaning blur. In photography this term is used to describe the quality of the areas in the picture which are not in focus.
When referring to Bokeh, we can distinguish some of it characteristics:
– Is the light/dark gradient smooth or sharp?
– What shape will a small dot of light take what it is in the Bokeh area? (mirror lenses for example, create a bagel like Bokeh)
Subscribe to:
Posts (Atom)