Wednesday, October 26, 2016

E.C. Flickr Weekly video reviews due Mondays

Happy Halloween 2016 <--- watch me

Ideas for Photostories and inspirations.
Write about what you learned from the video. 

your review should have a Qr code (link to the video) so I can see what you watched as well. 

Monday, October 24, 2016

2nd Marking Period: PPT #4: Camera Lenses + practice on exposure triangle

We learned about how to adjust the setting on the DSLR body to control exposures...
Now we will about the Lenses to see how we can control the Depth of Field.

Powerpoint 4: Camera Lens should include the following...
add examples pictures over weekend print out by Monday
Share Daily of your online research progress on Google slides...
                                                                  
Day 1: Oct 24, 2016 (Cite your sources and write in your own words!)
slide 1:Lens Focal length (the basic difference between lenses)
slide 2: Normal Focal Length (the most like human vision)
slide 3: Long Focal Length (telephoto lenses) 
slide 4: Short Focal Length (Wide-angle lenses) 
Day 2: Oct 25, 2016
slide 5: Zoom, Macro, and Fisheye Lenses
slide 6: Focus and Depth of Field (Dof)
slide 7: Automatic Focus
Day 3: Oct 26, 2016
slide 8:Depth of Field (controlling sharpness in a Photograph) how Focal length affect Dof 
slide 9: More about Depth of Field (how to preview and setting it up to the desired f-stop) 
slide 10: Perspective: How a photograph shows depth 
slide 11: Lens attachments (close up and filters)
Day 4: summaries Due Oct 27, 2016
slide #12
 (Practice for the Projects). upload to Flickr with labels and description
Write up: Exposure triangle: Defined with examples Taken with DSLR
(A (av) mode)  Picture with Small aperture & Large Aperture (Dof)
(S (tv)mode)   Picture with Fast shutter Speed & Slow shutter Speed (motion).
(M mode)  Picture with Low ISO and High ISO (image quality)


(write up on the observation of your practice shots).

add Qr code to your write up and print out.
************************************************************************************
Day 5: Oct 28, 2016 
slide #13
Add Class exercise:
Given the following scenarios, what are the appropriate settings for focal length, aperture, shutter speed and ISO? Lens used? 

        1) Beautiful sunny day and you want to take sharp image of a building from a close distance.
         ISO=           Shutter Speed =           Aperture=            Lens (Focal length)=

2) At a birthday party with candle lights only and you’re taking a picture of the cake 
          ISO=           Shutter Speed =                      Aperture=            Lens (Focal length)=

3) Early Morning, sun is not up yet and you’re taking a picture of the beach and 
you want everything to be in focus.   
           ISO=           Shutter Speed =         Aperture=       Lens (Focal length)=

4) You’re taking a picture of your significant other in a crowded place in the afternoon at 5:30PM near Times Square. You only want your subject to be in focus and everything else to be blurry.    
            ISO=            Shutter Speed=                    Aperture=       Lens (Focal length)=

5) You’re taking a picture of a Lamborghini in a racetrack with overcast daylight but want to give motion blur to everything else but the car.   
ISO=        Shutter Speed =                      Aperture=          Lens (Focal length)=

6) You’re taking a picture of a ninja during broad daylight (assume ninjas are fast
!)
                 ISO=             Shutter Speed =             Aperture=       Lens (Focal length)=

7) You’re in your corner office on the 10
th floor and you are taking a picture of your friend that works on the 10th floor in a neighboring building during broad daylight at 12:00PM.
           ISO=         Shutter Speed =           Aperture=      Lens (Focal length)=

Tuesday, October 18, 2016

1st marking period evaluation

Monday: Taking the picture with DSLR and upload to Flickr.

Tuesday Photoshopping in Bridge 

Wednesday: Write up (all work printed out)

Thursday : 1st marking period pkg due with Parent signature.

Friday: Make up day and extra credit presentation day... if you didn't present last time you can make it up today.

Friday, October 14, 2016

1st report card checklist (all powerpoints printed)

1st marking Period for ___________________________________ anything turned in after Monday 10-18-16 will not be counted
AJS11-0___ 
Participation (5%)DueLate?E.C.Due FlickPhoto (s)
Presentation

23-Sept8-Sept
Selfie&Best__ /2
Flickr & QR  

8-Sept14-SepDiagram__ /1
drawing 
14-Sept5-OctPPT #2__ /12
press passPower Points (30%)11-Oct
Photostory __ /10
SD card (5%)PPT #1: Camera 11-Sept 14-Oct
4 lights__ /4

PPT #2 Photo Art 05-Oct17-Oct
Test__ /3
QUIZ (10%)PPT #3:Lights14-Oct18-Oct
Total___ / 30%
DSLR____ Test  with write up (20%)

last week for marking period 1: Project Test #1

But first let's learn how to set up the camera to take the picture in Manual Mode...

read up on the manual on how to adjust the camera setting in "Manual" M mode.
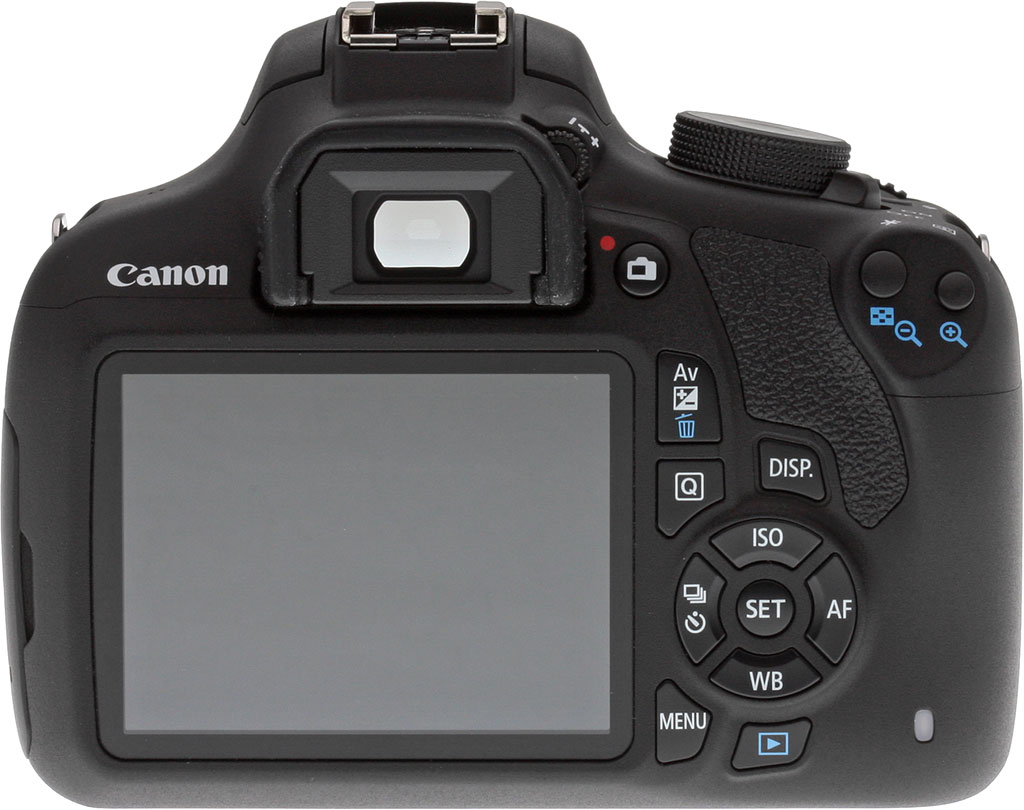
2nd, 3rd and 4th period - Canon Rebel T-5 manual 
 
take 1 set HIGH to Low ISO, 1 set with large vs. small aperture (AV) and 1 set of fast vs slowshutter speed (Tv) 

6th pf Nikon d3200 manual 
8th pd Nikon d3100 manual 

read this article over the weekend from Digital Photography School .com or DPS.

Project #1: Due Wed 10-17-16 example
Value of Light in Manual Mode (use hardlight) Flickr pix # 30a, 30b,30c(b&w) 

**************************************************************************************************
For this TEST project you have to shoot your " art piece" in Manual mode only.

set the camera in the following setting!

In Menu: set the image quality to RAW (NEF/CR2) + fine / L  and the ISO to 400 (light sensitivity).

In Aperture Mode : Adjust the f-stop to F/6.3

In Shutter Speed Mode: Adjust the shutter speed or exposure to 1/100 sec

Take one in this setting. if the picture comes out too bright or too dark. you may NEED to make some adjustments to obtain a properly exposed photo without flash.

Upload JPG to Flikr.com as pic #30a-b
#30a: Test default setting - what is wrong with it?
#30b: corrected setting - what did you adjust?

************************************************** Google share .NEF or .CR2 first as Part 1***********
 Part 2: Post retouching with PHOTOSHOP

After you upload your photo to your computer.

open Photoshop and look for BR or Bridge to locate your NEF file.
open NEF (RAW) file in Photoshop. in the open camera  RAW editor. (watch video )

make your adjustment. like Exposure - fill in the light - add the black... etc.

when you are done. OPEN IMAGE and save in JPG so you can upload this as Pic #30c on Flikr.com
once uploaded to FLickr goto Avairy and de-saturate to B&W 
*********************************************************************************
Part 3: Write up (printed) & Present Flickr in class.
goto pupilpath to download the writing template
talk about all the technical aspect to create this Still life project.
making sure you include. ISO, F-stop, exposure and focal length.

Write Up: (How were you able to create the Value of light in this photo?)
What SD card did you use for the test? Explain how this Photo is an art work. 
Does it contain an element of art? What about its Design principle?
How did you set up the lighting for this photo-shoot? what kind of lighting did you use? 
What did you find / learn from this art Project? 
****************************************************** 
yeah 1st marking period is DONE!

Thursday, October 6, 2016

Week # 6: PPT # 3 & project 1

Trying out Edmodo.com  
 Group Code: pnqcbw

watch this video:Karl Taylor's basic lighting lessons to start ppt#3

10/11/16 Do now: Create a FLICKR album for photo story # 1 - send album link
Tuesday: Start on the last slide for   marking period 1 PPT#3: Photography Lighting Guide
               Cover slide: title & Qr code Due Friday 10/14/16
  Slide #1:Intro Video review..https://www.youtube.com/watch?v=u9prcUCHlqM
Thursday
  Slide #2: Hard Light definition and 3 Flickr examples with Links
  Slide #3: Soft Light definition and 3 Flickr examples with Links
  Slide #4: Transimitted Light definition and 3 Flickr examples with Links
  Slide #5: Reflected Light definition and 3 Flickr examples with Links
  Slide #6: All types of lights examples taken by you with phone and DSLR and
                 upload the DSLR version to Flickr. (4 from your phone; 4 from DSLR)
  Slide #7: Manual Mode: ISO control / Aperture control / Shutter speed - how to adjust it?
  Slide #8: Class worksheet-  last part 8 situations ( extra credit)
 
************** end of the marking period with...next week - bring a small personal item for the test.****
 Project # 1 Test: The Value of light


Digital Photography School .com

http://digital-photography-school.com/digital-photography-tips-for-beginners/

Extra credit: write reviews for the articles that helps you with your Photography projects....
FYI: 8-ways-photography-can-improve-your-life

watch this video:Karl Taylor's basic lighting lessons to start ppt#3

Photostory #1: Event coverage - Dress for Success or Club Fair

using for you've learned from PPT # 2 to cover the event of Dressed for Success or Club Fair...

in Flickr create an album with the title of Photostory #1: Dress for Success Class of 2017 edition
Write your story in the description box of the story...
and label each photo with different element and principles of art.

Flickr check list:
#1: Selfie 
      What camera did you use to take it?
#2: Best Photo so far
      what makes it a good photo? 

#3: Diagram of the DSLR camera. 
      Canon Rebel T-5 or Nikon D3100 or D3200 ( which one did you draw?)

#4: Lines - Element of Art
#5: shapes / form - Element of Art
#6: space - Element of Art
#7: value - Element of Art
#8: Texture - Element of Art
#9: color - Element of Art

#10: Emphasis - Principles of Design
#11: Visual Balance - Principles of Design
#12: unity - Principles of Design
#13: contrast - Principles of Design
#14: Movement/Rhythm - Principles of Design
#15: Pattern/Repetition - Principles of Design

#16 to #25 Photostory#1 : Dress for Success

#26 to 29 PPT # 3 - 4 Types of lighting in Photography
#30a, 30b,30c  Project #1 (Test)